
Every hobby astronomer needs an orrery, and the Kopernikus-Planetarium by AstroMedia is one of the options to get. A review about all pros and cons.
What even is the Kopernikus-Planetarium?
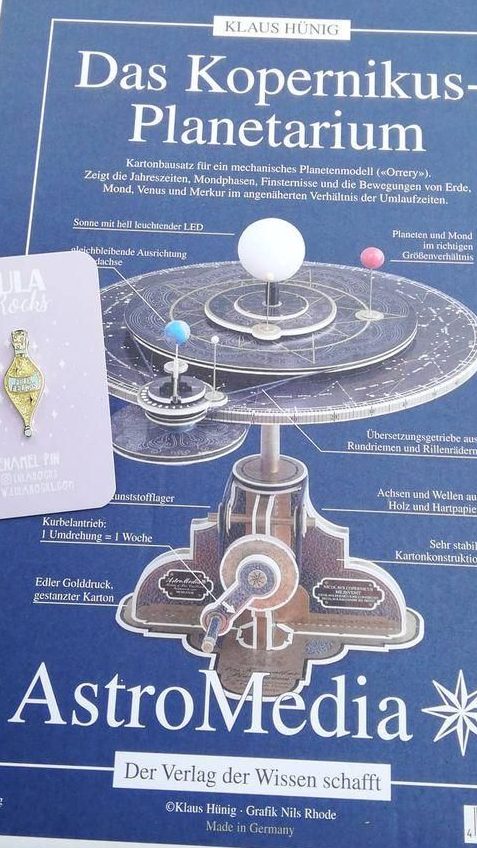
The Kopernikus-Planetarium by is a DIY paper model for 47,50 € where you build your own functioning orrery—a mechanical model of the solar system. The official description that you can also find when buying it is as follows:
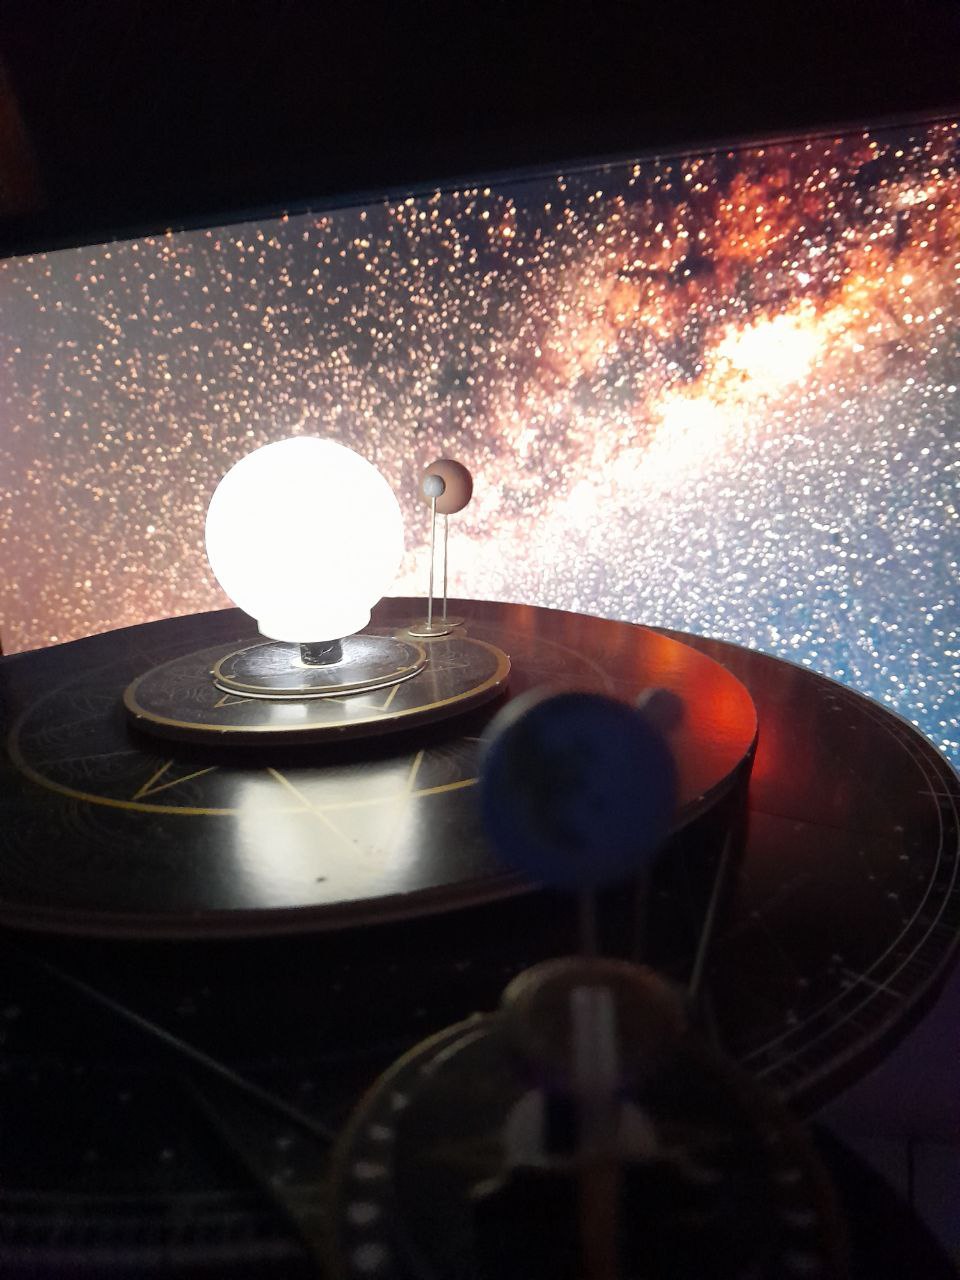
“The world’s first mechanical planetary model as a cardboard kit: It shows the movements of the inner planets Mercury and Venus, as well as the Moon and Earth, with the Earth rotating around its tilted and consistently oriented axis. One turn of the crank on the gear system of rubber belts and grooved wheels corresponds to the passage of one week. This causes six different simultaneous movements, which approximate the actual orbital periods relative to one another. Many celestial phenomena can be explained from the Copernican (heliocentric) standpoint, such as the Sun’s journey through the zodiac or the conjunctions of Mercury and Venus with each other and the Sun. The Sun, with bright LED lighting, not only demonstrates the change of seasons in a dark room but also the creation of moon phases, eclipses, and the crescent phases of Venus.”
How the assembly works
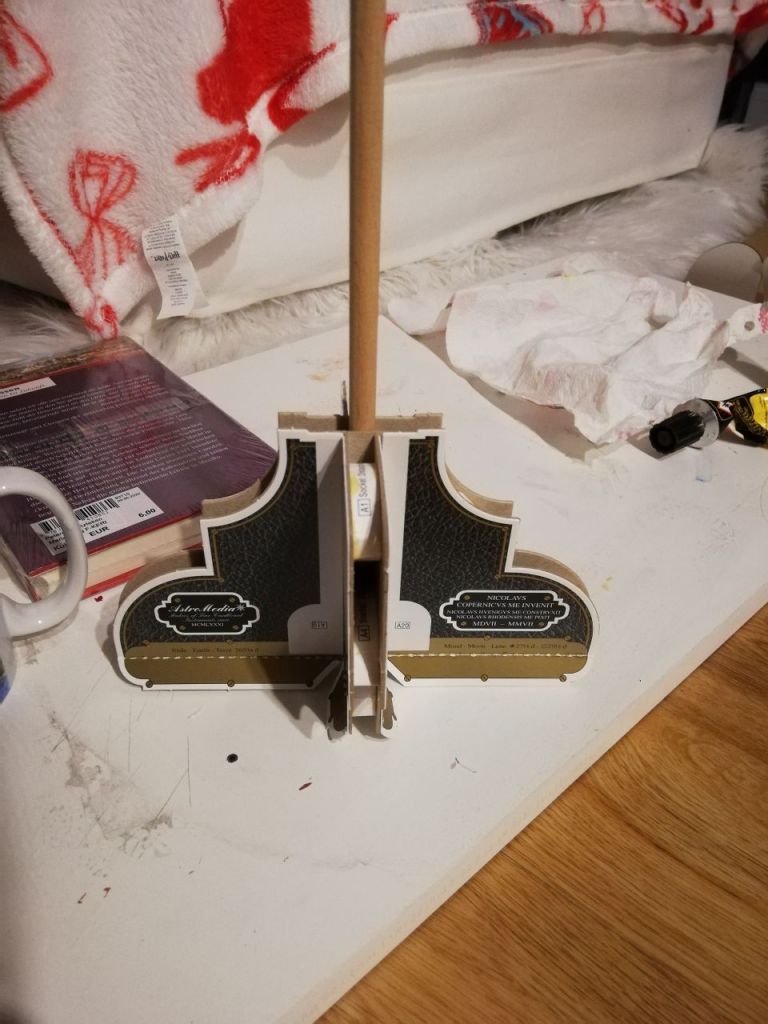
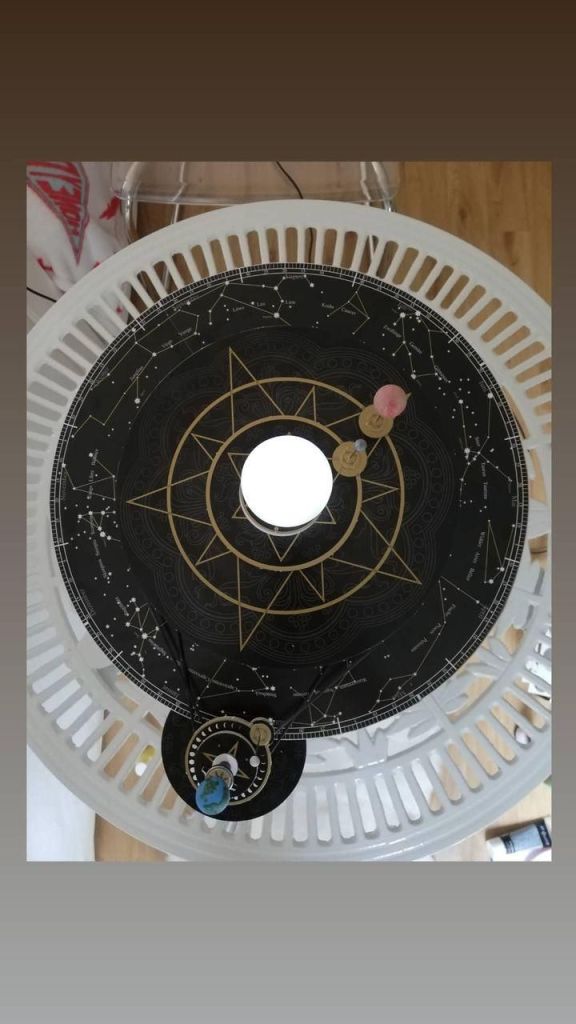
When opening the box, you will see that you have to start building the orrery completely from scratch. The main elements are just loads and loads of sheets with perforations that you carefully punch out and glue together. You have sheets of thicker cardboard that form the skeleton, and sheets of thin printed paper with the design that you glue on top. You also get some thin plastic disk, some “rubber bands”, plain wooden balls for the planets, the sun, a light and fixtures for the planet.
Now here is what you need to be aware of: You need to create EVERYTHING by yourself. If you take a look at the crank for example: The disks around it, you punch out the cardboard and the printed paper and glue the paper on both sides of the disk. And that process for ALL disks. And the crank itself, you take a long strip of paper and roll it up until it is a 3D cylindrical object and no longer a flat strip of paper. On the following WIP pic, you can also see that for the base, you have to glue in these white circles in between the walls as spaceholder. These circles, you also have to form them out of a strip of paper (many many times) and then glue between the cardboards. And then cover the cardboards with paper! You also need to paint the planets yourself, but that’s fun.
Also quick sidenote, I never finished glueing the sun onto the model because I could not find a glue where it sticks 😀
Negative aspects
Complexity of Assembly: I was simply not prepared for how intricate this project is and how much from scratch you have to start from. This could have of course been avoided with better research, but since you’re reading this article, clearly you’re better at that and it won’t come to a surprise to you!
Did not understand the instructions: This is the main point of criticism. I did NOT UNDERSTAND THE INSTRUCTIONS AT ALL. There are no pictures, it’s just big A4 pages of text that I did not understand, I cannot repeat this enough, I had no clue what was going on. I would not have been able to build this without the help of this most amazing blog: MichelsWunderland. He wrote a super intricate detailed instruction with pictures and is honestly such a lifesaver! I still had a little bit problems every now and then, but it was very doable thanks to him.
Fragility: Handling such small parts that are made from something as delicate as paper can be dangerous when having to glue everything together. There was a constant fear of dots or strings of glue accidentally tarnishing the surface, and of course this happened every now and then. This is not the manufacturer’s fault and completely on me, but I want to give a heads up that if you’re not experienced in model building, be extra careful. Not just during the assembly, but also afterwards for its maintenance.
Positive aspects
A good challenge: While the assembly process is tideous, it is the good kind of challenging and frustrating – the one where you feel extremely accomplished after. It is more rewarding to build something completely from scratch, rather than sticking some cutouts together and be done after a few minutes.
Beautiful design: The final product also simply looks beautiful. Despite being made from paper, cardboard, glue and desperation, it looks quite high quality. It’s an eye-catcher in itself and even holds up in close ups despite me not having the most steady hand.
Entertainment for a long time: The assembly is also a great occupation when being prepared. Putting on some nice music, having some snacks on the side and you got yourself some really nice evening. MichelsWunderland estimated the assembly time for about 30 hours, it definitely took me much longer but maybe you’re as fast as him.
Overall Rating
If you don’t know what’s waiting for you ❤️❤️❤️🖤🖤
If you know what’s waiting for you ❤️❤️❤️❤️🖤
If MichelsWunderland didn’t exist to help ❤️❤️🖤🖤🖤

Leave a comment